Labels

Friday, December 31, 2010

Ivory, khaki, tea dyed or sand? (Dolls)

Last summer, my three-year-old started having “bad dreams” and wanting to get in bed with us in the middle of the night.  He’s never been into “loveys,” but I tried to encourage him to hug his elephant if he woke up at night.  I thought it might help to comfort him.  Then one day, we got on the subject of baby dolls, and I asked him if he wanted a baby doll to hug when he went to sleep, and he said yes.  So, I started looking around for baby dolls.  I just wanted a simple doll made of fabric, but none of what was being sold really appealed to me.  This was around the time I’d gotten my sewing machine, and I remembered seeing patterns for dolls on etsy.  So, I decided I could try making my son a doll.  I was hoping to make it in time for Christmas, but that didn’t quite happen.  (I always seem to have more goals than there is time in the day.)
 

One of my issues with buying a doll was that I wanted to get him an Asian doll if possible, and there were not many options in terms of cute Asian dolls.  But when I set out to get materials to make a doll, I realized how hard it is to make an Asian doll.  First off, I had a hard time figuring out what color fabric to use for the skin.  I ended up getting four different colors of broadcloth:
 (ivory, khaki, tea dyed and sand)

I stared at them for a long time and kept asking my husband, “What fabric matches the kids’ skin the most?”  Ultimately, I decided on the khaki color.  Even though it looks really dark next to the other colors, and it didn’t really match my kids’ skin exactly, I thought it best represented Asian coloring.  I realized I had to look at it more in “big picture” terms than trying to find the fabric that matched exactly.  (I do realize that it’s kind of crazy that I thought this in-depth about fabric color.)

I had gotten my doll pattern from Bit of Whimsy, and I had actually emailed Sarah to ask her what color fabric she used for her Asian dolls, and she had told me khaki.  But I still wanted to make sure that khaki was exactly right.  I guess I had to figure it out for myself.

Doll-making turned out to be kind of fun.  It wasn’t too hard.  Except for the part where you had to turn those skinny arms and legs right side out.  I decided since I was getting all the materials to make the doll, I might as well make one for the baby girl, too.  I think they turned out cute!  I never realized when I started sewing how fun it would be to watch the things you’re making take shape.

 
I probably could use more practice embroidering the faces, though.  I traced the eyes off of the pattern, and I think one eye is bigger than the other on the pattern.  I did the girl doll first, and you can tell that the right eye is bigger than the left.  With the boy doll, I made them more even sized.  Next time, I’d probably also use a little darker thread for the nose and mouth.

I also got the bright idea to use one of my son’s old shirts for the boy doll’s shirt.  Well, a sweet idea, but since the shirt was made of knit fabric, it was a little harder to work with.  When I tried to sew the doll closed, all the different layers of fabrics kept slipping on me.  I became friends with the seam ripper on this project.  So, I finally hand basted it first and then sewed it on the machine.  That made it a lot more manageable.


I get kind of nostalgic seeing this shirt.  It was one of my favorites when he was small enough to wear it.  He was not yet two in this picture.  Still has that babyish look.  *sniff*

Not sure how much the kids appreciated the dolls, though.  This is how I found the boy doll at the end of the day.

 
And when my husband took the doll into my son at bedtime, he emphatically said, “No, no, no.”

As it turned out, I think I enjoy the dolls more than they do.  I’d love to try to make a Waldorf doll one day, but maybe when the kids would be more into them...

Friday, December 24, 2010

The Brother's Maiden Project


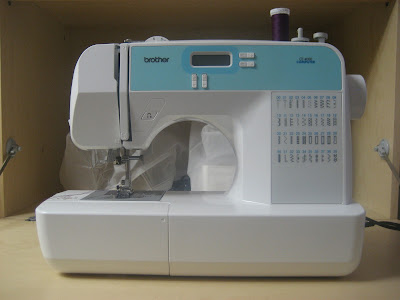
After I finally took the plunge and bought my sewing machine, I think it sat in the box for about a month.  I was excited to get started sewing but also intimidated by the idea.  So, to get myself going, I decided I'd volunteer to be a pattern tester for one of the ladies who sold patterns on etsy.  I knew it would force me to get the sewing machine out and get started on something, since I had someone else to answer to.  So, I volunteered to test out this cardigan pattern:
 
I think it turned out pretty cute. 


I’m a total geek, because I got so excited watching it come together.  The first part I did was the sleeves, and when I put together that teeny tiny sleeve, with a little bit of gather on the shoulder, it was so cute, I could have died.  I showed it to my husband, but he didn’t quite share my enthusiasm for how cute it was.

Working with knit fabric was a little challenging, but it wasn’t too bad.  The hardest part on this project was doing the ribbing around the front placket area and the neck area.  The ribbing material kept bunching up.  It wasn’t moving with the bottom fabric, so there are places where I had to sew over the bunching.

 
Oh, and the buttonholes gave me a heck of a time, too.  The fabric would get stuck in the machine and the thread would bunch up.  I ripped a lot of thread out.  I finally managed to make the buttonholes by putting stabilizer underneath.  That allowed the fabric to move.  It’s not that pretty, but they are buttonholes.  I think if the thread matched the fabric more, the ugliness might not be as obvious.

 
And they say to cut open the buttonhole with a seam ripper?  Um, no.  I had to cut that thing open with scissors.  It was impervious to the seam ripper.

 
But, overall, not bad for a first project, no?  (If I do say so myself.) 
I also learned that the sewing machine can sew on buttons.  Kind of snazzy!

Oh, and in case you’re wondering, this is not fabric from the “nice fabrics” pile.  I bought this at the local fabric store to use as a “test” fabric.  But I rather like this fabric now that I’ve seen it take shape.  I might try to remake this cardigan in a larger size.  I think I have enough of the purple fabric to do it.


I think she likes it:

Thursday, December 16, 2010

I have a confession to make

I hoard fabric. 

Over the years, I’ve done some sewing here and there.  In graduate school, I bought a $20 sewing machine and made my own curtains and some blankets for my niece and nephew.  But never any clothes.  I did grow up watching my mom sew, and I remember a lot of things she told me about sewing.  It was only this past year, when I had my baby girl, that I started to seriously think about making clothes.  Clothes for her, of course.  There is something about those teeny tiny girl’s dresses that are irresistible. 

And that’s where my obsession with er, admiration and love for fabric began.  I’d bought my first pattern, a pillowcase dress, and I’d started looking around for fabrics to make the dress.  Who knew there was so much beautiful fabric in the world?  I ended up with a box of fabric and a long list of projects on my to-do list, even before I’d bought my new sewing machine.  (My $20 sewing machine got lost somewhere in our many moves.) 

When I finally did get the sewing machine, I found myself hesitant to use any of the beautiful fabric that I had bought, because, well, it was so beautiful.  I wouldn’t want to cut it up and ruin it.  I’d much rather go out to Joann Fabrics and get some discount fabric to cut up.  I keep collecting more lovely fabric but not wanting to use it.  I now have a tub of fabric, which I store on a shelf in my bedroom closet.  It’s gotten so heavy, I have to have my husband bring it down and put it away again.  He keeps commenting that he thought the more you sew, the less fabric you should have.  Such navïeté. 

So, I started this blog as a place to talk about my sewing projects, as I make an effort to use more of the fabric I've accumulated.  Maybe I will even make that pillowcase dress one day. 

Here’s to recovery from fabric hoarding...
(although this post is backdated to December 2010, this picture was actually taken March 2011, so it did take a few months to accumulate all this fabric!)